At HB Design, web developers are given Photoshop PSD files that were created by Web Designers to code. This blog includes some Photoshop tips to make working with those PSD files easier.
Selecting layers
Designs often have many layers, sometimes in nested layer groups. It can be difficult to find the layer that you need when you are extracting image assets or slicing.
A simply way to get to a layer is to turn on auto-select, setting it to “Layer”. These controls are located on the options window just below the menu bar:
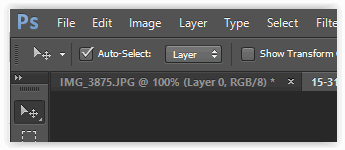
Now when you are using the “move” tool, if you click anywhere on the canvas, that layer will be activated. If you don’t want the layer to be activated automatically when you click, then you can uncheck the “Auto-Select” checkbox. If unchecked you can activate the layer by holding the command/control key down when clicking.
Saving image assets
In the past, to save out an image from the canvas you would “slice” the image using the slice tool and then use the “Save for Web” menu item. That is, in Photoshop CC, no longer available on the main File menu. You can still get to it via a keyboard shortcut: command/control – alt – shift – s, or from the File->Export menu.
Instead of doing that you can now select the layers to export and do a “quick export as (file type). A quick way of doing this is to right click on the layer and select the “Quick Export as Png”
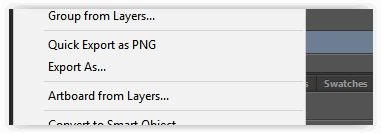
Unfortunately this only creates an image from a single layer. If you have multiple layers selected you get multiple images. What can you do if you need to create an image that is built from multiple layers?
In Adobe Photoshop CC there is a feature called “Generate” located on the main File menu.
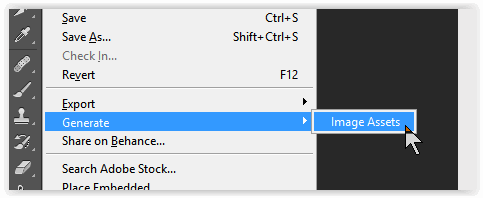
If you activate Image Assets then you can put the multiple images in a layer group and name the layer group the image name you want to save. For example, if you name the layer group “xyzlogo.jpg”, then Photoshop will automatically create a jpg image with that name and save it to the disk for you. Note that this works for individual layers as well. So if you have activated image assets then instead of doing quick exports, you just need to name your layer.
Photoshop has hundreds of features like this that can save you time. To learn more about these look at the following references.